RBAC How-to
Role Based Access Control (RBAC) definitively grants permissions to accounts in a positive, additive way.
This page describes the steps to define a role and assign the newly created role to a user account.
RBAC in the UI
Define a Role in the UI
You can use the Hydrolix UI to define roles.
Only users with administrator access can view, create, and edit roles.
Follow these steps to create a role in the Hydrolix:
- Log in to the portal.
- In the left sidebar, click Security to navigate to the security panel.
- Navigate to the Roles tab to open the roles editor.
- In the top right corner of the screen, click the + Add new button.
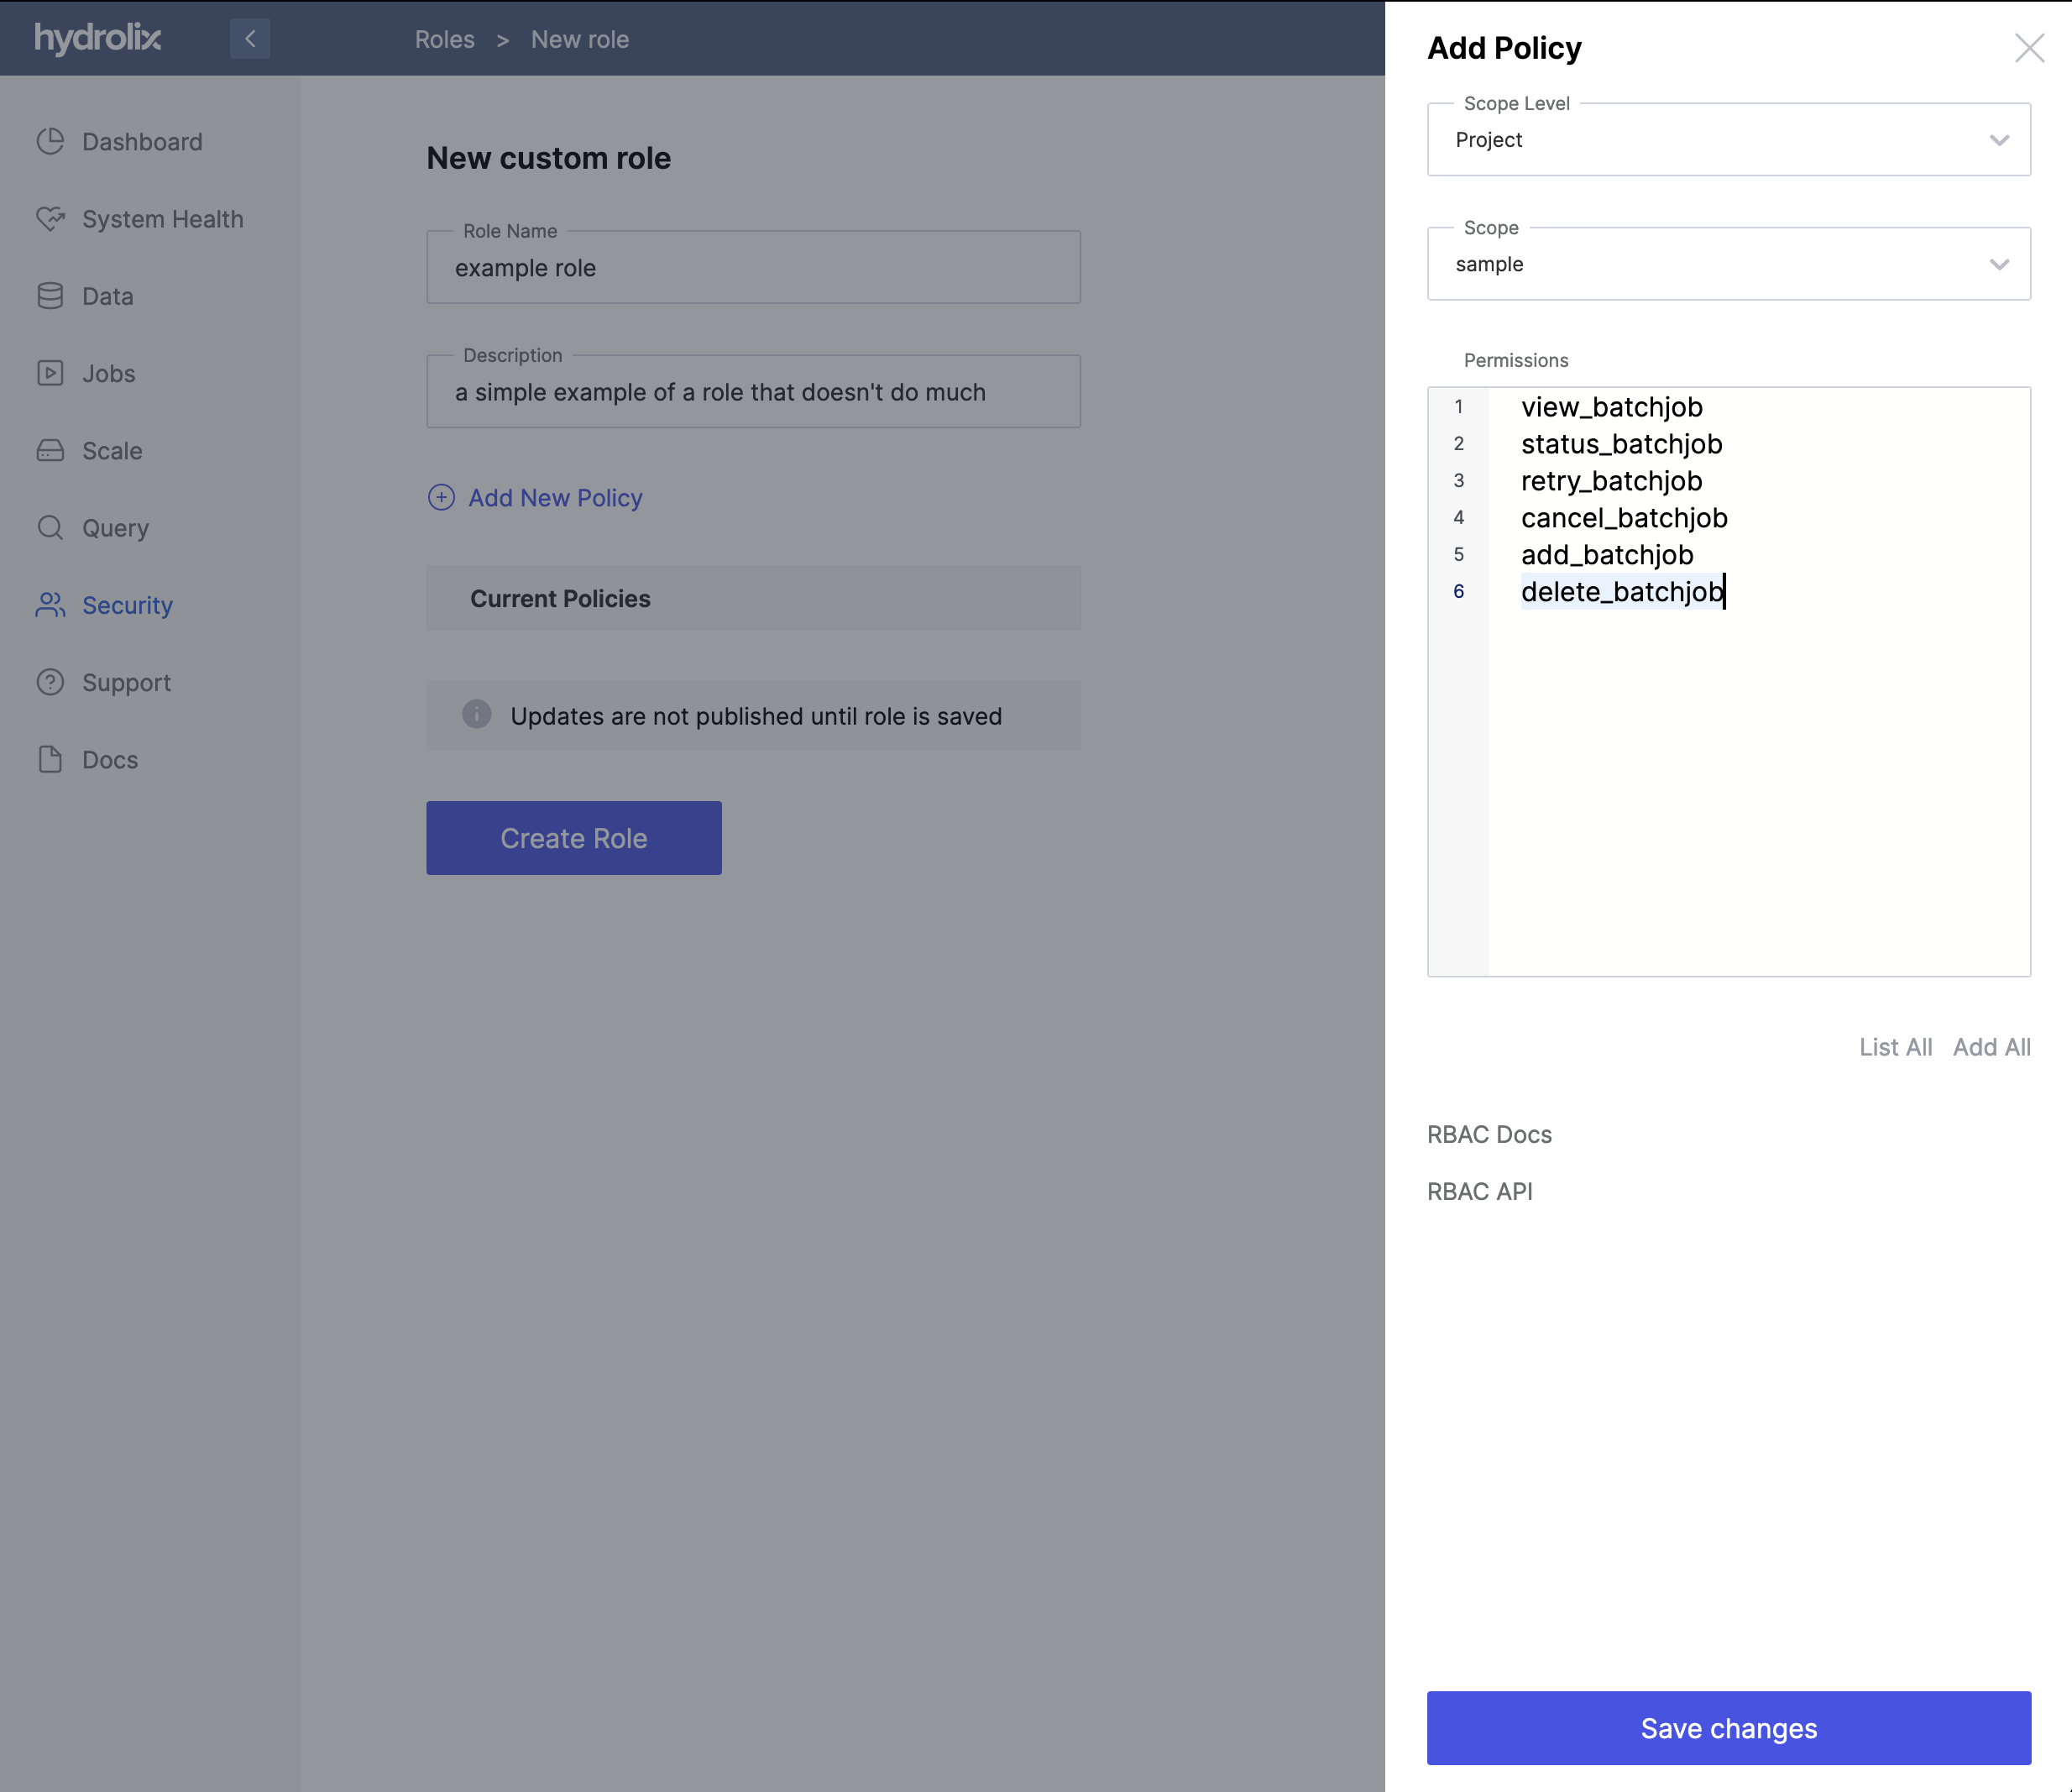
- Select the Role option in the right sidebar.
- Choose a unique name for your role.
- Add a Description that explains the purpose of your role.
- Select an existing policy from the list, or click Add New Policy to define a new policy.
- Select a Scope Level, which defines the level of the resource hierarchy addressed by your new role.
- Select a resource within that scope level, such as a specific project in your cluster.
- In the Permissions box, enter the list of permissions to grant users with the role.
- Click the Save changes button to add the policy to your role.
- Repeat the previous five steps until you've defined the permissions needed for your role.
- Click the Create Role button to save the role within your Hydrolix cluster configuration.

Assign a Role to a User in the UI
You can use the Hydrolix UI to assign and remove roles associated with a user.
Only users with administrator access can assign and remove roles from user accounts.
Users must have at least one role at all times.
Follow these steps to assign a role to a user in the Hydrolix UI:
- Log in to the portal.
- In the left sidebar, click Security to navigate to the security panel.
- Navigate to the Users tab to open the roles editor.
- Click on the user whose role assignment you would like to change.
- In the Select role dropdown, add and remove roles as needed to combine permissions for the user.
- Click the Save changes button to save the role assignment within your Hydrolix cluster configuration.
RBAC through the API
RBAC operations can be performed by the REST API.
For purposes of demonstration, we'll use the
curlcommand due to its widespread availability. Other ways of interacting with the API are listed on the Query Data page. Piping the output of thecurlcommand through thejqutility makes the results much more readable.
The first steps below position you to be able to use the API to modify RBAC settings.
Log in to the API
Get the bearer token, which is good for the next 24 hours, to authenticate future API calls. This command assumes you've set the $HDX_HOSTNAME, $HDX_USER and $HDX_PASSWORD environment variables:
export HDX_TOKEN=$(
  curl -v -X POST -H "Content-Type: application/json" \
  https://$HDX_HOSTNAME/config/v1/login/ \
  -d "{
    \"username\":\"$HDX_USER\",
    \"password\":\"$HDX_PASSWORD\"
  }" | jq -r ".auth_token.access_token"
)
List orgs and projects from the API
The rest of these examples use the $HDX_ORG and $HDX_PROJECT environment variables.
List and choose our Hydrolix installation's organizations by listing them with the following command:
curl -X GET -H "Content-Type: application/json" \
   -H "Authorization: Bearer $HDX_TOKEN" \
   https://$HDX_HOSTNAME/config/v1/orgs \
   | jq -r ".results.[] | [.uuid,.name] | @tsv"
From the output, find the organization's UUID you want to use and assign that to an environment variable called $HDX_ORG.
Similarly, use this command to find the list of projects available to the organization:
curl -X GET -H "Content-Type: application/json" \
   -H "Authorization: Bearer $HDX_TOKEN" \
   https://$HDX_HOSTNAME/config/v1/orgs/$HDX_ORG/projects \
   | jq -r ".[] | [.uuid,.name] | @tsv"
From the output, find the project you want to use and assign its UUID to an environment variable called $HDX_PROJECT.
Create a new role with the API
This example creates a new role called test_role_1 that has read access to tables within that project:
curl -X POST -H "Content-Type: application/json" \
  -H "Authorization: Bearer $HDX_TOKEN" \
  https://$HDX_HOSTNAME/config/v1/roles -d "{
    \"name\": \"test_role_1\",
    \"policies\": [
        {
            \"permissions\": [
                \"view_org:metadata\"
            ],
            \"scope_type\": \"org\",
            \"scope_id\": \"$HDX_ORG\"
        },
        {
            \"permissions\": [
                \"dictGet_sql\",
                \"select_metadata_sql\",
                \"select_sql\",
                \"show_columns_sql\",
                \"view_function\"
            ],
            \"scope_type\": \"project\",
            \"scope_id\": \"$HDX_PROJECT\"
        }
    ]
}" | jq
Invite a new user with the API
This will start the process of creating a new user. The system will attempt to e-mail an invitation to the address supplied, using that as the name of the account. If the e-mail isn't successfully delivered to the e-mail account, the invite_url in the POST response can be used to confirm the new user.
curl -v -X POST -H "Content-Type: application/json" -H "Authorization: Bearer $HDX_TOKEN" https://$HDX_HOSTNAME/config/v1/inviteurl -d "{
    \"email\": \"[email protected]\",
    \"org\": \"$HDX_ORG\",
    \"roles\": [
        \"test_role_1\"
    ]
}" | jq
Result:
{
  "invite_url": "https://$HDX_HOSTNAME/verifyaccount/ZWU4OWM2OWMtY2UxMi00YTAwLTlmMTYtZjhlMTQzYzZlYjJh/bzhb2o-8d08517022529381fb7125e008a28045"
}
This user has the test_role_1 role from the example above. Once the two examples have been configured, the result will look like this:
Updated 3 months ago