Compact & Optimize Data (Merge)
Hydrolix includes an automated compaction and optimization Merge service as part of its data lifecycle. This service is enabled by default for all tables.
The Merge service combines small partitions into larger ones, improving compression efficiency and decreasing partition count. This results in better performing queries and a smaller storage footprint for the same data.
Below is a diagram of data partitions in storage. During the merge process, three smaller partitions on the left are combined to create one larger partition on the right with a longer time interval.
For more information about how the Merge service fits into the rest of Hydrolix, see the Merge page in our platform documentation.
Enable merge controller (v5.3.0 or later)
By default, merge operations are handled by two services: merge head and merge peer. The merge controller is a recommended drop-in replacement for merge head with operational, observability, and performance enhancements.
Enable merge controller with the following changes to the Hydrolix cluster configuration:
spec:
  merge_controller_enabled: true
  scale:
    merge-head: 0
    merge-controller: 1
Apply these changes in a single update to the HydrolixCluster custom resource definition. The following changes will take place within the cluster:
- The
merge-headpod shuts down - A
merge-controllerpod starts up - All
merge-peerpods restart in all pools
Enabling or disabling the merge controller should have minimal impact on a live cluster. Merge operations will be temporarily delayed while the merge peers restart.
Merge controller: deployment considerations
Replicas
merge-controller, like merge-head, runs as a singleton. merge-controller will perform a number of checks on start-up and refuse to bootstrap if any of the following conditions are met:
- There are more than 0
merge-headpods currently running - There are more than 0
merge-controllerpods currently running.
Simultaneously operating more than one merge service won't damage the cluster or your data. However, doing so is inefficient and may result in the pods entering a CrashLoopBackoff state, thereby breaking merge functionality altogether. Therefore, merge-controller ensures there is only ever one of itself or merge-head running and never both.
Resource Utilization
While the merge-controller uses more memory than merge-head to maintain an instantaneously accurate view of the entire merge subsystem, the cluster's overall CPU and storage access demands decrease on the new software.
Merging partitions together is a bin packing exercise, with the goal being to combine sets of smaller partitions with varying sizes into the fewest number of larger partitions without exceeding fixed size limits. The new bin-packing algorithm used in the merge controller, using an in-memory approach and a strategy of either first-fit or best-fit, significantly improves efficiency over merge head. The removal of an intermediate queue and the use of direct gRPC connections between merge peers and the merge controller also contribute to performance gains.
In general, merge-controller uses more memory when:
- There are a large number of active merges
- There are a large number of tables with high ingest volume. More volume results in more partitions created. More partitions means higher merge counts.
The impact of these variables is typically small but may be detectable.
Failure Modes
merge-controller is resilient to normal (such as manual restarts, scale changes) and abnormal (such as pod evictions, OOM terminations) process terminations. merge-peer pods will continue to perform any merge operations they were processing at the time merge-controller was terminated. However, they won't receive any new work until merge-controller returns. Additionally, merge-peer pods will repeatedly try to re-connect to merge-controller. Upon successful reconnection, merge peers report their current status, allowing the merge-controller to reconstruct current status.
Disable Merge on Tables
All tables have merge enabled by default. You can disable and re-enable merge with the PATCH table API endpoint. Disabling merge will immediately stop new merge jobs from running, but any merge jobs already in the queue will still run.
Disable merge only under special circumstances
Disabling merge isn't recommended, and may result in performance degradation.
For example, this API request will enable merge for a given table:
PATCH {{base_url}}orgs/{{org_id}}/projects/{{project_id}}/tables/{{table_id}}
Authorization: Bearer {{access_token}}
Content-Type: application/json
Accept: application/json

{
    "settings": {
        "merge": {
            "enabled": true
        }
    }
}
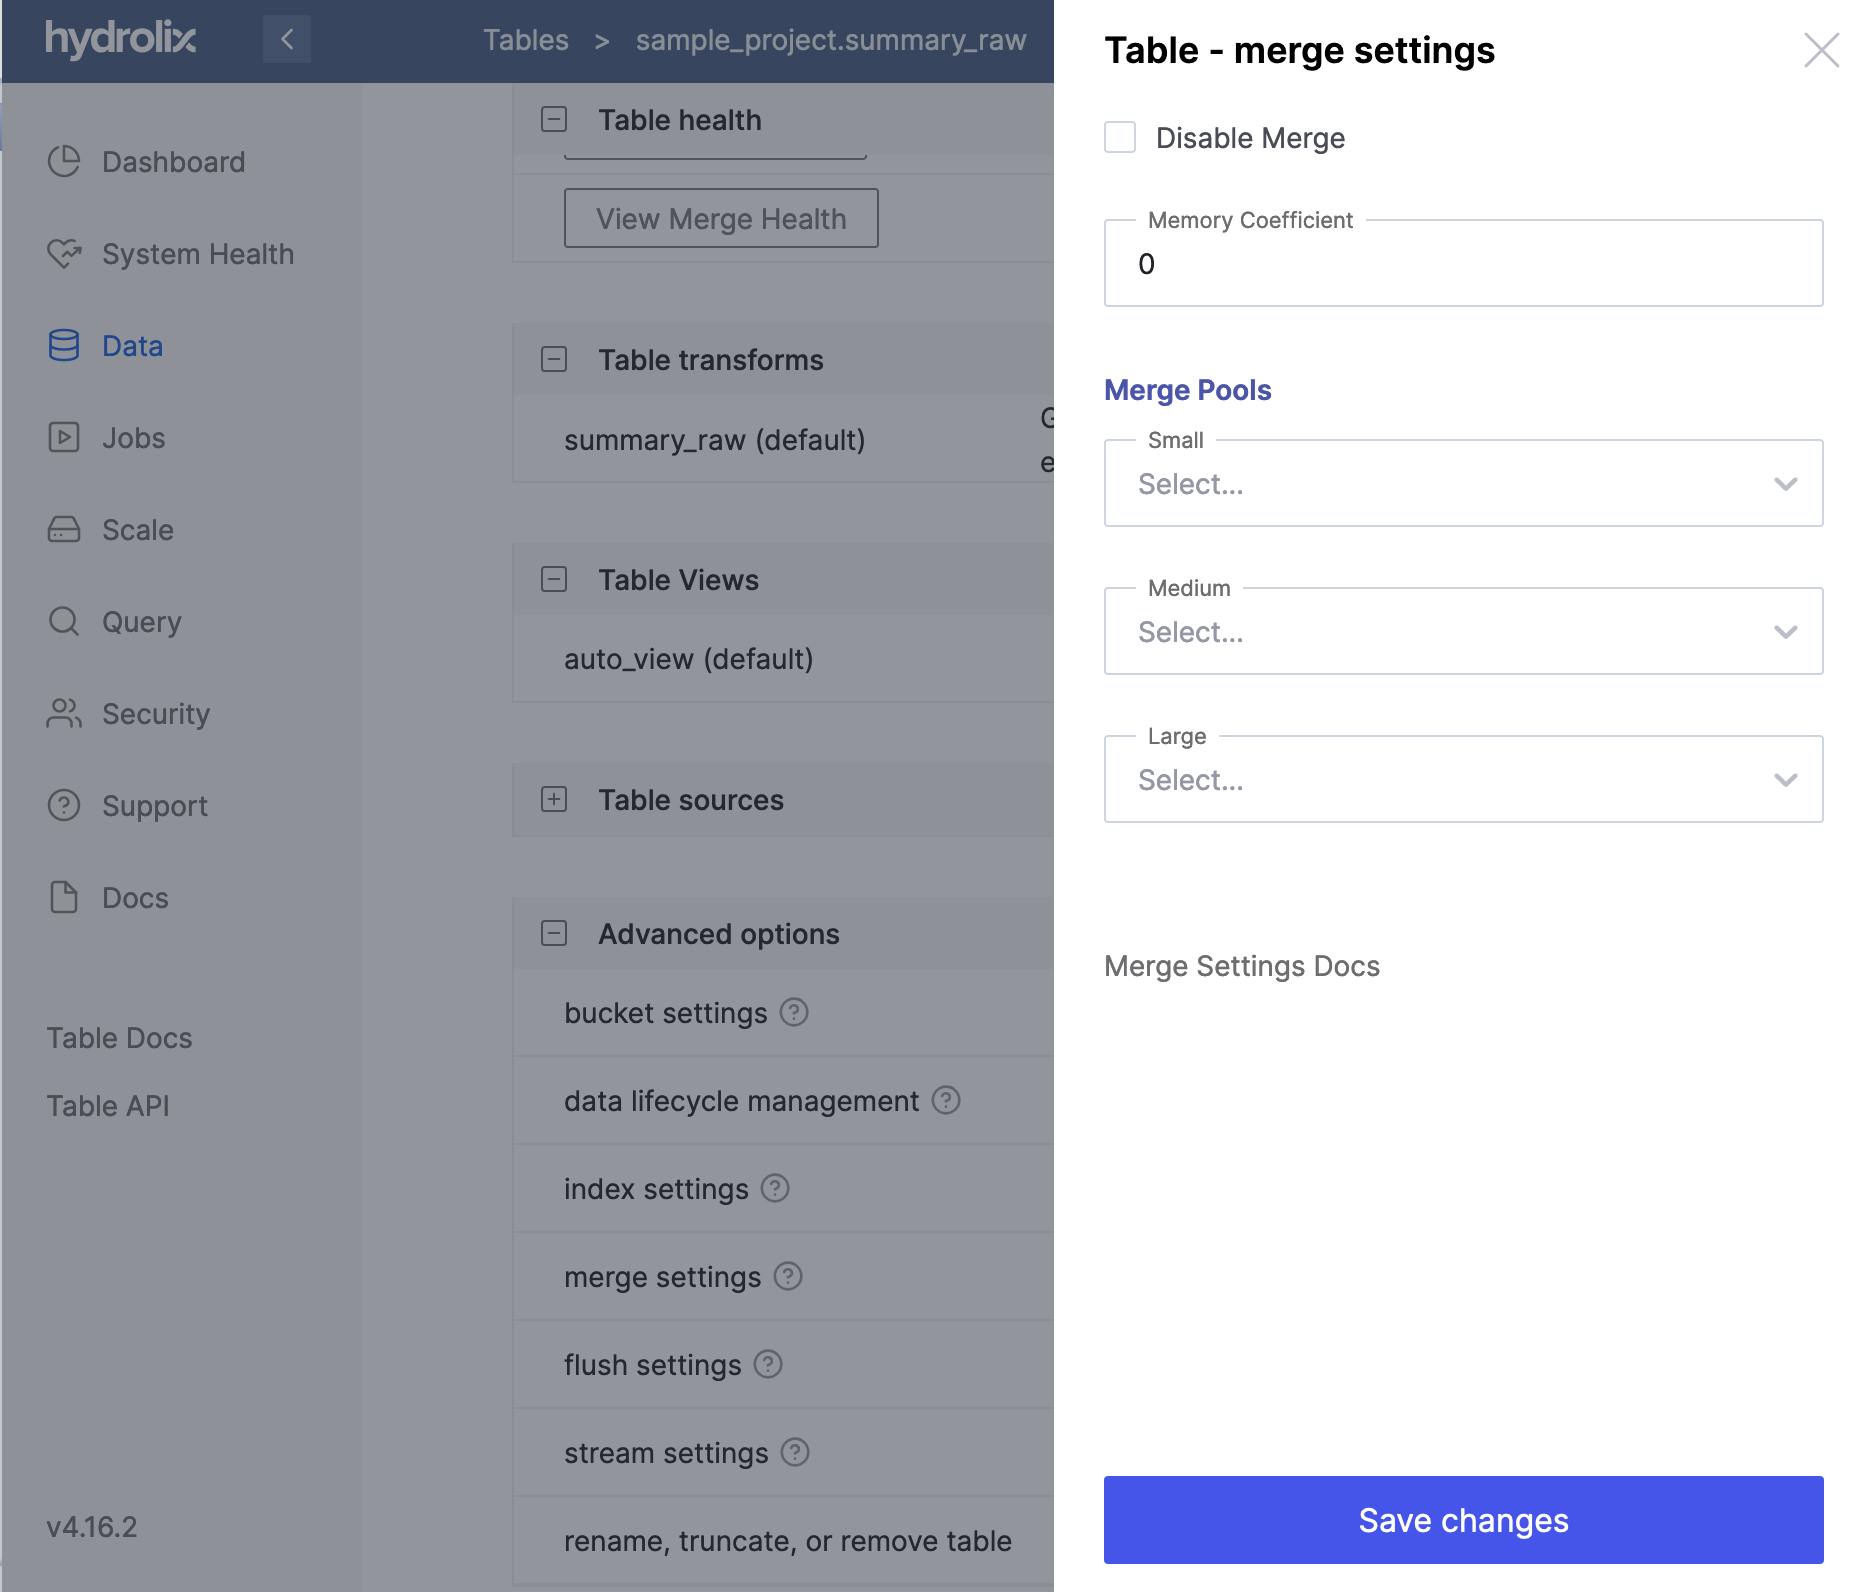
You can also disable merge for a given table through the web UI. Navigate to "Data," select the table you want, then find "merge settings" under “Advanced options” and click on the three dots in that row on the right. You can then select the "Disable Merge" checkbox from the menu.

Disable merge only under special circumstances
Disabling merge isn't recommended, and may result in performance degradation.
Merge Pools
Hydrolix clusters create merge components in three pools: small, medium and large. These three sizes each handle different partitions that are differentiated by several criteria. This ensures optimal partition sizing and spreads merge workloads across old and new data.
The following table shows the criteria used to assign partitions to merge pools
| If the max Primary Timestamp is: | ...and the size is within: | ...and the time width is within: | Resulting Merge Pool |
|---|---|---|---|
| Under 10 minutes old | 1 GB | 1 hour | small (merge-i) |
| Between 10 and 70 minutes old | 2 GB | 1 hour | medium (merge-ii) |
| Between 70 minutes and 90 days old | 4 GB | 1 hour | large (merge-iii) |
For example, reading across the table above from left to right: if a partition's last timestamp was 15 minutes ago, and it was 513 MB in size and 37 minutes in width, it would be sent to the medium pool.
If the partition were 2.5 GB, it would not be eligible for merge until 70 minutes after its last timestamp, and would be sent to the large pool and only if there were other eligible partitions (smaller than 1.5GB) with which to merge.
Partitions older than 90 days aren't considered
The merge system looks back only 90 days for partitions eligible for compaction.
Primary timestamp
For more information on primary timestamps, see Timestamp Data Types.
Custom Merge Pools
All tables have merge enabled by default, but sometimes you might want to create additional merge pools targeted at specific tables to separate merge workloads and avoid “noisy neighbor” effects. For example, you might create a special merge pool to handle merge within a Summary Table, distancing that workload from the main merge process.
Create custom merge pools with the pools API endpoint, then apply those pools to tables with the tables API endpoint.
Creating Pools
The following Config API command creates a custom pool by means of the pools API endpoint over HTTP:
POST {{base_url}}pools/
Authorization: Bearer {{access_token}}
Content-Type: application/json

{
     "settings": {
          "is_default": false,
          "k8s_deployment": {
               "service": "merge-peer",
               "scale_profile": "II"
          }
     },
     "name": "my-pool-name-II"
}
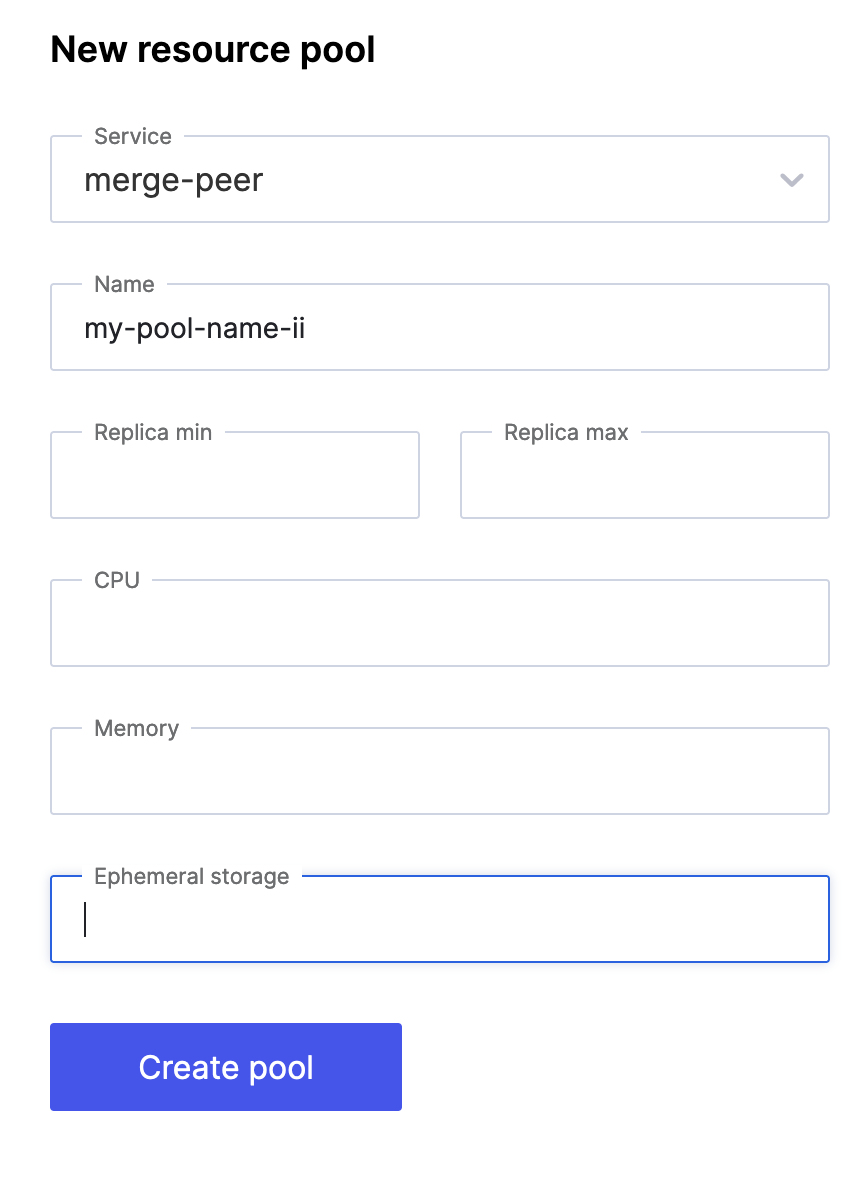
You can also do this in the UI by selecting the "Add new" upper right-hand menu, then "Resource pool."

Use the following settings to configure your pool:
| Object | Description | Value/Example |
|---|---|---|
service | The service workload the pool will utilize. For merge, this is merge-peer. | merge-peer |
scale_profile | The merge pool size, corresponding to small, medium, or large. | I, II or III |
name | The name used to identify your pool. | Example: my-pool-name-II |
cpu | The amount of CPU provided to pods. | A numeric value, defaults are specified in Scale Profiles. Example : 2 |
memory | The amount of memory provided to pods. | A string value, defaults are specified in Scale Profiles. Default units are Gi. Example:10Gi |
replicas | The number of pods to run in the pool. | A numeric value or hyphenated range. Defaults are specified in Scale Profiles. Examples: 3 and 1-5 |
storage | The amount of ephemeral storage provided to pods. | A string value, defaults are specified in Scale Profiles. Default units are Gi. Example: 5Gi |
Assigning Pools to Tables
The following API request assigns a set of custom pools to a table with the tables API endpoint:
PATCH {{base_url}}/orgs/{{org_uuid}}/projects/{{project_uuid}}/tables/{{table_uuid}}/
Authorization: Bearer {{access_token}}
Content-Type: application/json

{
    "name": "my-table",
    "settings": {
        "merge": {
            "enabled": true,
            "pools": {
                "large": "my-pool-name-III",
                "medium": "my-pool-name-II",
                "small": "my-pool-name-I"
            }
        }
    }
}
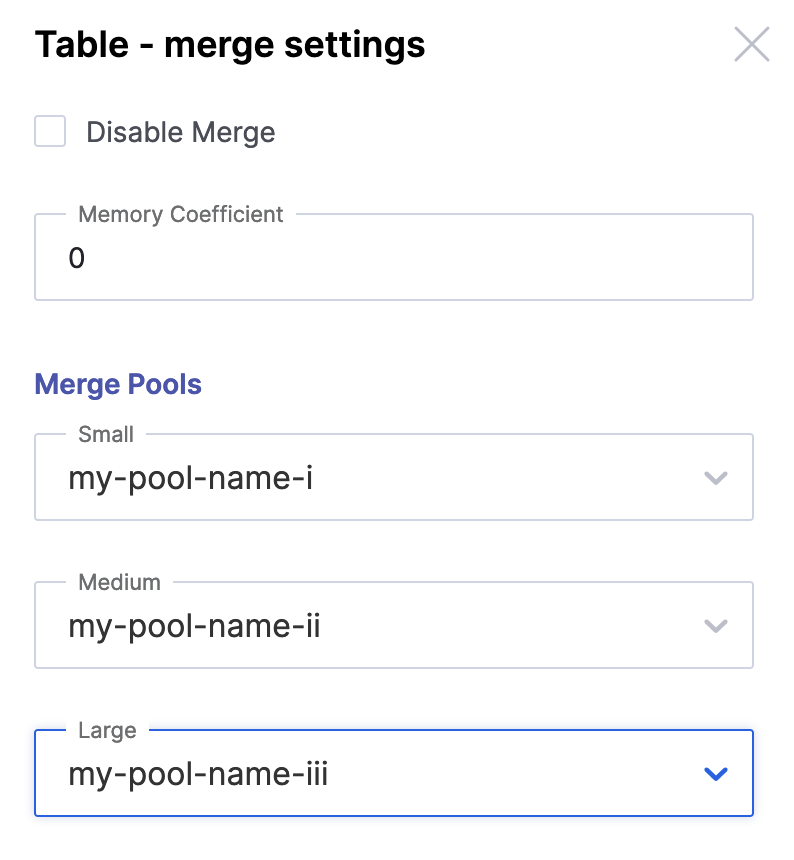
You can also configure this in the UI. Navigate to "Data", select the table to which you want to assign new pools, then find "Merge settings" under "Advanced options." You'll see this menu:

Use all three pools
For optimal merge performance, provide a large, medium, and small pool.
Troubleshooting: useful queries
Duration of merge (without upload to storage)
max(merge_sdk_duration_summary{app="merge-peer-*", quantile="0.9"})
Merge controller latency in communicating with query catalog
histogram_quantile(0.99, sum by(le, method) (rate(query_latency_bucket{app="merge-controller"}[$Resolution])))
Count of partitions tracked in memory
sum by (instance) (tracked{app="merge-controller"})
Count of currently active merge operations
sum by (target) (active_merges{app="merge-controller"})
Count of known partition segments
sum by (target) ((segments{app="merge-controller"}))
Count of constructed candidates ready to be merged
sum by (target) ((candidates{app="merge-controller"}))
Count of fetched partitions awaiting segmentation
sum by (target) (partitions{app="merge-controller"})
Count of partitions sourced that are already tracked
sum by(pool_id) (rate(duplicate_partitions{app="merge-controller"}[$Resolution]))
Count of connected clients
sum by(pool_id) (connected_clients{app="merge-controller"})
Percentage of time merge-peers are performing work
sum by (pool) (merge_duty_cycle{quantile="1"})
Merge peers upload duration
max(upload_duration{quantile="0.5", service="merge-peer", app="merge-peer"})
Race lost counter
SELECT count(*)
FROM "hydro"."logs"
WHERE ( app LIKE '%merge-peer%' or app LIKE '%merge-controller%')
AND error LIKE '%race lost%' and message like '%failed%'
AND ( timestamp >= $__fromTime AND timestamp <= $__toTime );
Merges completed
SELECT count(*) as "Merges" FROM hydro.logs
WHERE ( timestamp between $__fromTime AND $__toTime )
AND app = 'merge-peer'
AND query_phase = 'end'
AND pool = 'merge-peer'
AND error IS NULL
AND exception IS NULL
Merges completed with failures
SELECT count(*) as "Merges" FROM hydro.logs
WHERE ( timestamp between $__fromTime AND $__toTime )
AND app = 'merge-peer'
AND query_phase = 'end'
AND pool = 'merge-peer'
AND error IS NOT NULL
AND exception IS NOT NULL
Actual partition count by project and table
sum by (target, project_name, table_name) (actual_partition_count{project_name="$Project", table_name="$Table"})
Ideal partition count by project and table
sum by (target, project_name, table_name) (ideal_partition_count{project_name="$Project", table_name="$Table"})
Merge efficiency by project and table
sum by (target, project_name, table_name) (efficiency{project_name="$Project", table_name="$Table"})
Partition memory size by project and table, histogram
histogram_quantile(0.99, sum by(le) ((partition_distribution_bucket{project_name="$Project", table_name="$Table"})))
Age of buckets in milliseconds, histogram
histogram_quantile(0.99, sum by(le, target, basis) (bucket_duration_bucket{app="merge-controller"}))
Buckets closed per second
sum by (target, basis) (rate(bucket_duration_count[$Resolution]))
Updated 16 days ago