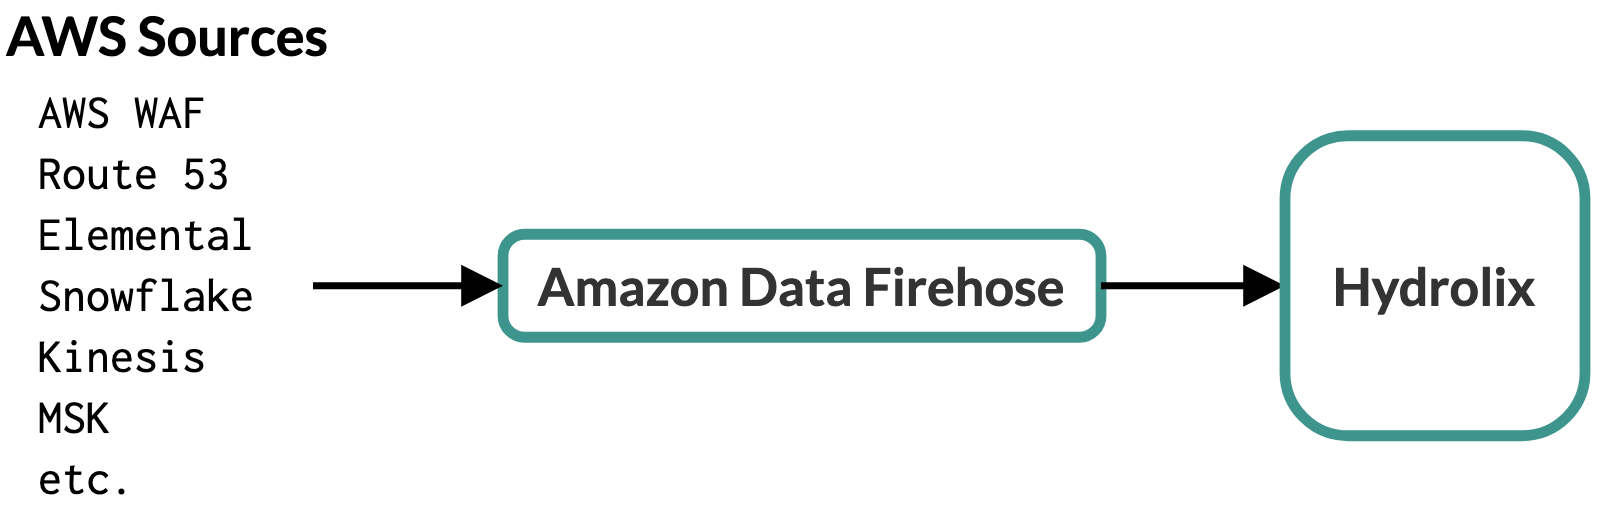
Amazon Data Firehose
Configure Amazon Data Firehose to accept data from any of these Amazon Data Firehose-compatible sources, then use Amazon Data Firehose to send data to your Hydrolix cluster using the Hydrolix HTTP Streaming API.
Prerequisites⚓︎
Gather this information. The HTTP Endpoint URL and Access Key are constructed in later steps.
| Item | Description | Example Value | Source |
|---|---|---|---|
| Firehose Stream Name | The name of the Amazon Data Firehose. This is meaningful in the AWS context, but not in Hydrolix. | My-Sample-Firehose |
Your choice |
| HTTP Endpoint URL | The URL of your Hydrolix cluster's ingest endpoint, appended with table, project, and transform information. | https://hostname.hydrolix.live/ingest/eventtable=sample_project.sample_table&transform=sample_transform |
Hydrolix project and table setup (see below) |
| Access Key | A base64-encoded string containing a valid Hydrolix username and password delimited with a colon | Unencoded: you@your.email.domain:your.password Encoded: eW91QHlvdXIuZW1haWwuZG9tYWluOnlvdXIucGFzc3dvcmQ= |
Username/password encoding process (see below) |
| Table | The table in your Hydrolix cluster that will store data from Amazon Data Firehose in the format project.table. See Create a Table using the API. |
sample_project.sample_table |
Your choice |
| S3 Backup Bucket Name | The name of a bucket that Amazon Data Firehose will save from failed transfers | s3://firehose-test-bucket |
Your AWS S3 administrator |
Create credential information⚓︎
Amazon Data Firehose sends data to the Hydrolix HTTP Streaming API with an accompanying X-Amz-Firehose-Access-Key HTTP header. The contents of this header is the Access Key, a base64-encoded, colon separated concatenation of these two values:
- The username for a valid user account for your Hydrolix cluster
- The account password
There are many ways to base64-encode this information. Here are example commands to base64-encode strings on Linux, macOS, and Windows platforms:
Create a transform⚓︎
Create a Hydrolix transform to format Firehose data stored in the cluster.
Create the transform with subtype firehose⚓︎
Amazon Data Firehose sends data in a special format that includes repeated base64-encoded data fields. Hydrolix JSON transforms have a transform subtype called firehose to ingest this Amazon Data Firehose format.
The example transform in this page ingests sample data into a Hydrolix table, for data generated from the AWS Console Test with demo data option in the Amazon Data Firehose configuration UI:

Create the transform using the UI⚓︎
-
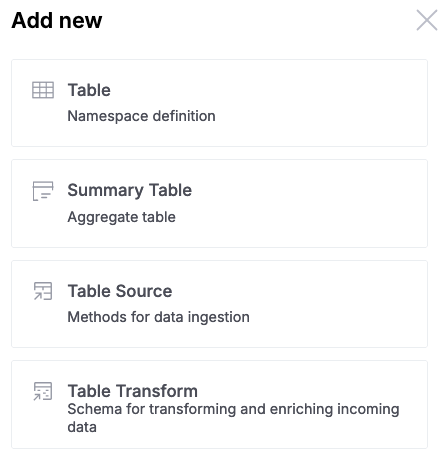
Attach a new transform to your table using the Hydrolix UI by selecting the Table Transform option under the Add new menu on the upper right-hand corner of the screen:
-
Fill in the resulting table with the name of your new destination table, a name for your transform, and a description:
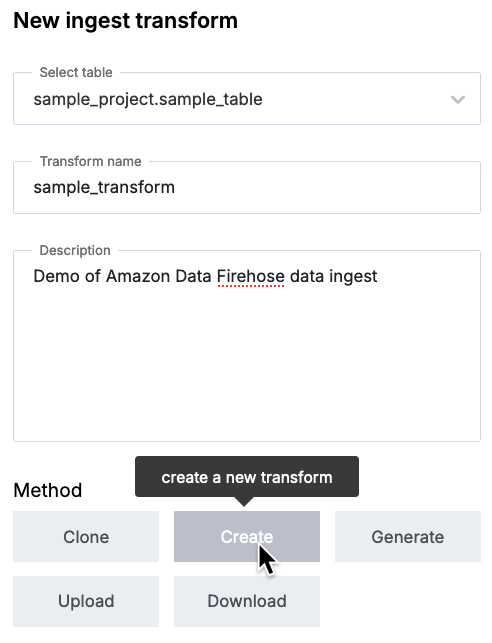
Select the Create button, then select the JSON Data type button.
-
This will bring you into the Hydrolix transform editor. Under the JSON tab -> Transform Output Columns, include the transform that will accept data from your data source. For example, this transform will accept data generated by the AWS Console's Test with demo data option:
Hydrolix transform
-
Remove any text in the middle Transform SQL column on that page.
In the right-most Sample data column, you have the option of pasting in sample data to validate the transform in the left-most column. For demonstration purposes, here is some sample data that was produced by the AWS Console's Test with demo data option:
Sample data
-
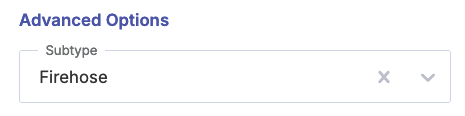
Designate this transform as a Firehose transform. Find the Format Options button underneath the right-most Sample Data field:

In the resulting options screen, select the Firehose transform subtype:
Select Save changes.
-
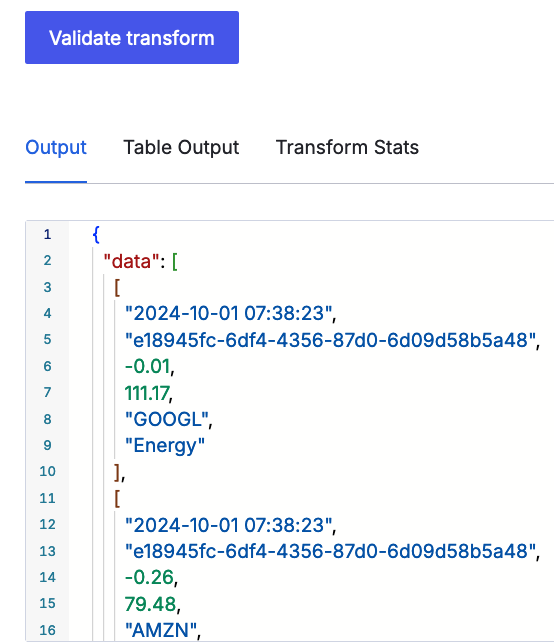
Optionally, validate the transform format against the sample data by selecting the Validate transform button. You should see JSON-formatted results populating the Output box.
-
The UI should show a sample of the properly-parsed data. Here's an example using the above sample data:
-
Once you're satisfied with the results, select Publish Transform.

Create the transform using the API⚓︎
Transforms can also be created and published using the Hydrolix Configuration API.
Learn more about transforms (optional)⚓︎
If you're unfamiliar with Hydrolix transforms, consult our Write Transforms page to help you get started. To help you see the "shape" of your incoming data, consider using a catch-all transform to help you write your final transform.
Create your Amazon Data Firehose⚓︎
Now that you have a Hydrolix project, table, transform, and encoded access key, you're ready to configure your Amazon Data Firehose.
-
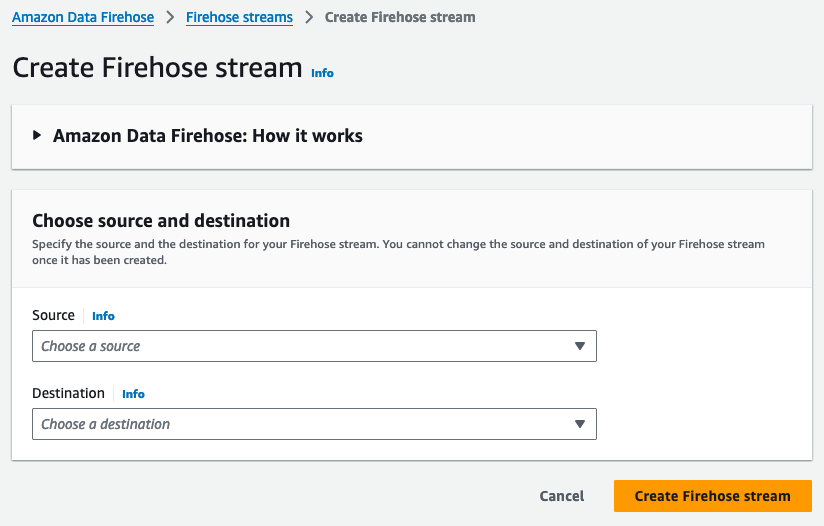
In the Amazon Data Firehose UI, click "Create Firehose Stream."
Specify stream source, destination, and name⚓︎
- Select the source of your data. For this example, use "Direct PUT."
- For the destination, select "HTTP Endpoint." This will unfold more options to identify and authenticate to your Hydrolix HTTP Streaming API.
-
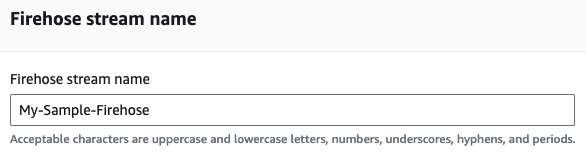
Under "Firehose stream name," enter a descriptive name. Note that this name has no effect on where the data goes, and isn't used in your Hydrolix cluster:
Skip the "Transform records" optional field.
Configure the destination⚓︎
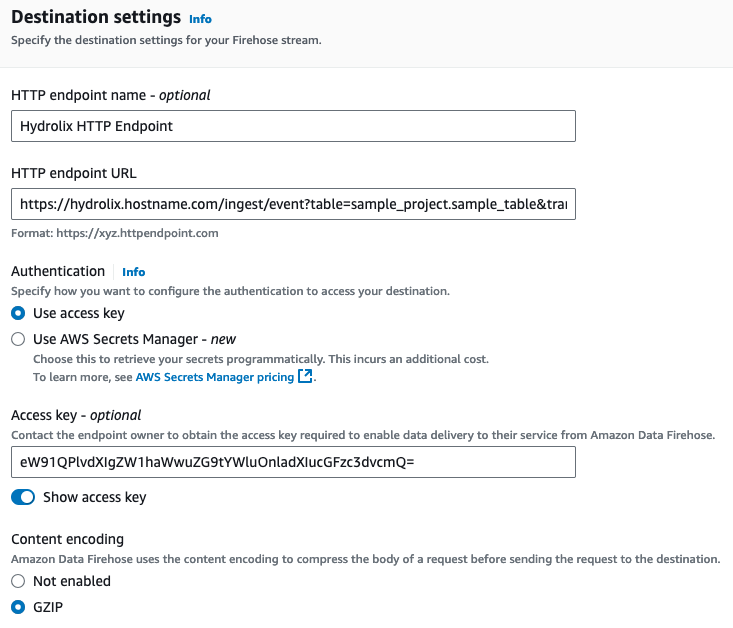
Fill in the required fields in "Destination Settings" to point your Amazon Data Firehose to your Hydrolix cluster.
- The HTTP endpoint name is for display and use in AWS, not Hydrolix.
- Enter a URL for your Hydrolix cluster's HTTP Streaming API, augmented by your chosen project name, table name, and transform name. This takes the form of
https://hostname.hydrolix.live/ingest/event?table=<project_name>.<table_name>&transform=<transform_name>. Using the values used in this document, it would look like this:https://hydrolix.hostname.com/ingest/event?table=sample_project.sample_table&transform=sample_transform - Under "Authentication," make sure "Use access key" is selected.
- Enter the base64 access key you created in the "Create Credential Information" step above.
-
Choose GZIP compression. Hydrolix also supports non-compressed payloads if you prefer.
Designate S3 bucket for failed transfers⚓︎
-
Configure which S3 bucket you would like Amazon Data Firehose to store data from failed transfers.
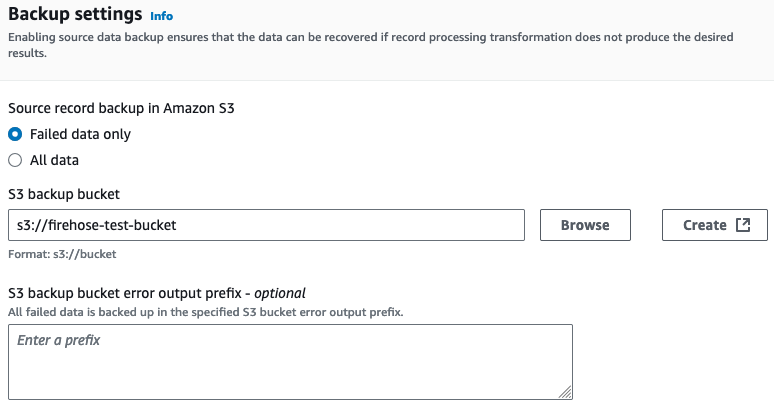
-
Accept the defaults in the remaining fields and click "Create Firehose Stream."
Test the integration⚓︎
At this point, everything should be set up, connected, and ready for a test. Send data through the service you've selected to be the source of your Amazon Data Firehose data and check the AWS Console's Destination Error Logs.
If you didn't set up a source for your Amazon Data Firehose as in the examples above, you can still test by using the aforementioned "Test with demo data" functionality in the AWS Console which is accessible from your Firehose Stream's UI.
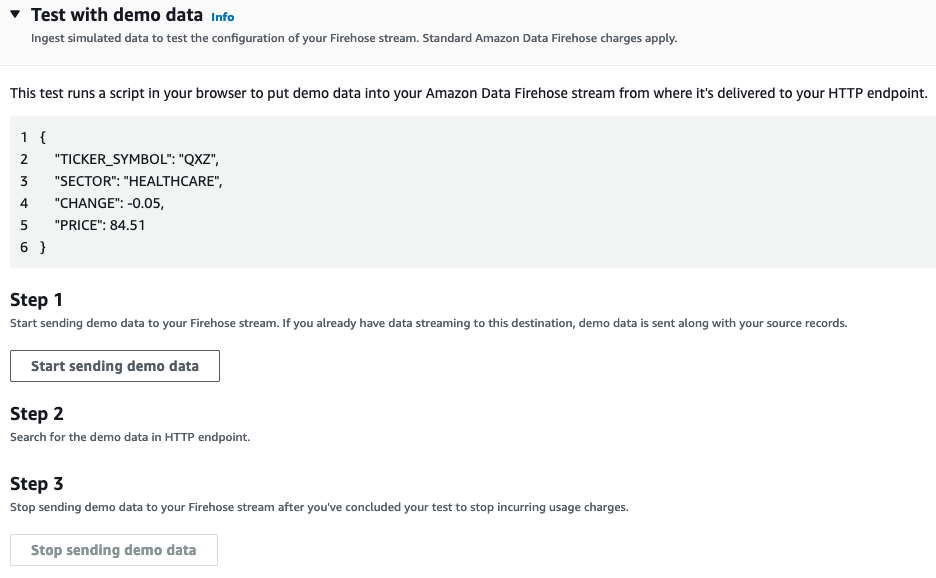
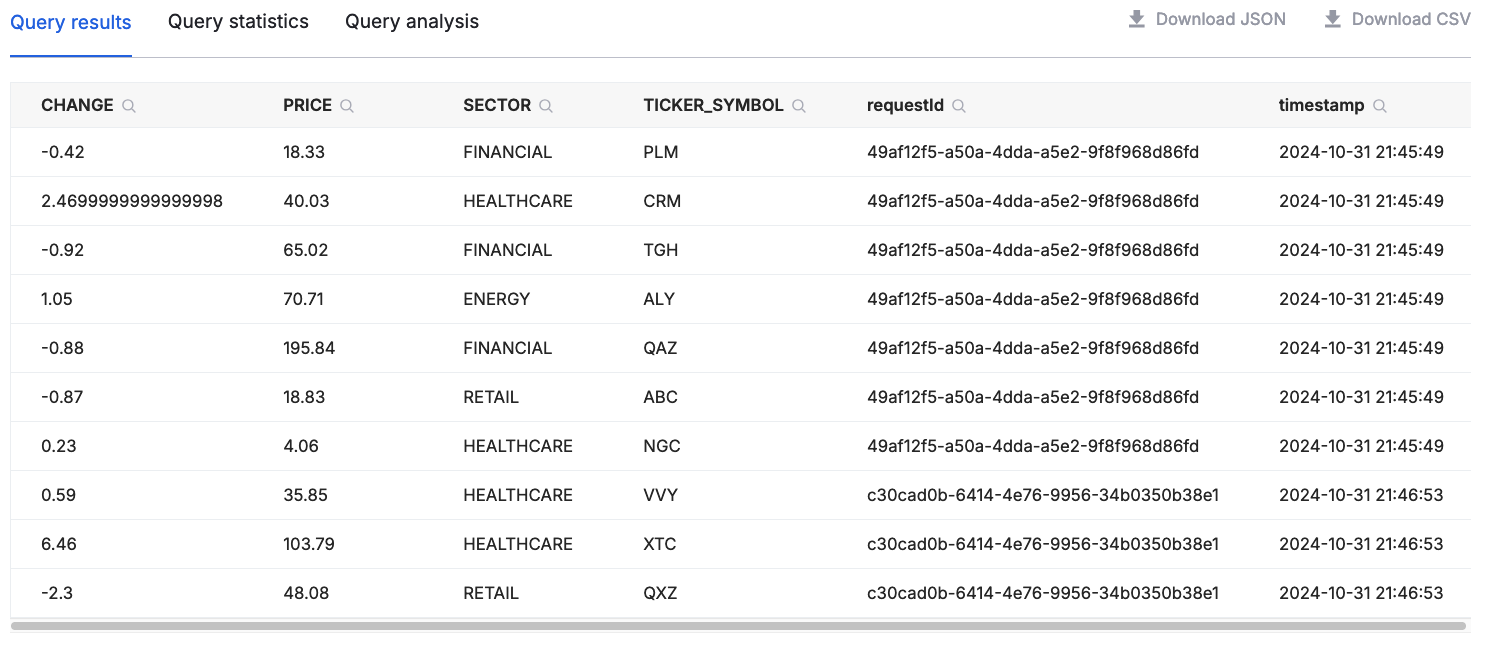
After you click "Start sending demo data," Amazon Data Firehose will send data to your Hydrolix cluster. If you used the transform given in the examples above, you can now query this data in Hydrolix. Data should start appearing within 15 seconds. Use the Hydrolix UI's query interface to run a simple select * from sample_project.sample_table limit 10 to see the data you've sent. Here's an example of the output:
Troubleshooting⚓︎
Test the authentication string⚓︎
It's easy to make mistakes while encoding, copying, and pasting authorization information. If you're unsure your encoded string is correct, try decoding the string and attempt to validate against the Hydrolix HTTP Streaming API using command-line tools.
Decode authentication⚓︎
The string resulting from these decoding commands should match the username:password you entered in the previous step:
cURL the Hydrolix HTTP Streaming API⚓︎
The cURL command is useful for testing authentication. Using commands similar to what's below, make sure the Hydrolix cluster authorizes properly. The /version endpoint is a simple API endpoint to test against. In the example below, make sure to replace hydrolix.hostname.com with the hostname of your Hydrolix cluster.
An unsuccessful validation will produce an Unauthorized error response like this: